⭐️MAIN MENU
🔝TOP TOOLBAR
🔘QUICK TOOLBAR
🖌BRUSH TOOLBAR
🥪 LAYER TOOLBAR
🥪⭐️LAYER MENU
100
a) Explain why the Predictive Stroke #10 is useful &
b) what happens when you change the level (1,2,3,4,5)
a) It smoothes your lines as you draw (and tries to predict what you are drawing)
b) 1 = less smooth, 5 = more smooth
100
How do you open the Quick Toolbar?
Click the circle icon at the bottom center of the screen.
100
Demonstrate what the smudge pen does (#16)
Blends colors together or smudges one color.
100
The very bottom layer shown (#29) is actually what part of the sketch?
background color
100
How do you open a layer menu?
Click on the layer you want to adjust.
200
Demonstrate how to move a sketch from one album to another (in case you accidentally make a sketch in someone else's album!)
1) Open the Album
2) click the checkmark
3) Click the sketch
4) Click Move To
5) Drag to the correct album
200
Which tool is similar to using a ruler or protractor in real life?
Guides
200
a) What it the purpose of the Double Puck, #27?
b) how do you turn it off & on
c)why is it helpful?
a) It gives you a small movable menu with your brush selection and color
b) Click the circle at the bottom center to open the Quick Toolbar, then click #25
c) Having the double puck turned on lets you switch the color of your brush more quickly.
200
Explain the difference between the two Sliders (#18 & #19) on the Brush Toolbar when using the Technical Pen.
Top slider = size
Bottom slide = opacity
200
How do you hide or show a layer?
Click the eye (#31)
200
a) What does Opacity (#33) change?
b) What is 0% opacity versus 50% vs 100%?
a) How see-through (transparent) the layer is.
b) 0 = totally see through (transparent)
50% = half see through (partially transparent)
100% = NOT see through, SOLID- not transparent
300
When you record a time lapse (#13) in Sketchbook, what does NOT show in the video?
The toolbars & menus.
300
Demonstrate how to use brushes and patterns/textures that are NOT shown on the brush toolbar.
Open the Brush Library (#15 is one way to get there)
300
Demonstrate how to remove the background of your sketch (make it transparent.)
The eye icon on the background layer (#29)
300
Why are layers useful when creating a sketch? Give an example.
Example: you want to draw a background with a pattern, and then text on top of it. You can put them in separately layers so if you have to edit one, it doesn't affect the other.
400
Demonstrate how you save a sketch as a PNG image to the Photos app.
*NOTE: some "Main Menus" look different depending on the version of Sketchbook on your iPad
(may look different on different versions of Sketchbook)
Main Menu > Share > Flattened Image (PNG) > Save Image
400
a) What will happen if you use the FILL tool (#6) to fill this shape with color?
b) Why?
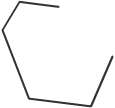
The entire background will be filled because the shape is not closed.
400
Demonstrate the three ways you can open the Color Picker (#24 aka Dropper Tool).
1. Quick Toolbar > Dropper Tool > Click the color
2. Double Puck > Color wheel
3. Hold your finger down on a color
400
If a brush seems to not be working right (ex: has a weird pattern), how can you restore it to the DEFAULT (original) settings?
1. Click the brush
2. Click RESET
400
Demonstrate an example of when you might want to use MULTIPLE (more than 1) layer in Sketchbook.
Ex:
-making a rough sketch, then adding final touches in top layer
-tracing an image
400
Demonstrate the difference between Merge and Merge All when you want to combine different layers together.
Merge = Combines the selected layer with the one below it.
Merge All = Combines ALL layers into one.
500
Demonstrate how to use the Lasso in the Selection Tool (#4) to move one part of your drawing to another area of that layer.
1. Click Selection > Lasso
2. Select the part of your layer you want to move
3. Click the layer you are working on and click "Cut"
4. Click the layer again and click "Paste"
5. Move the selection where you want it and click Done.
500
Demonstrate why the transparent color tool (#23) is useful. How is it different from the erasers (#17)?
Use ANY tool like an eraser! (Erasers in the brush toolbar have fuzzy edges- sometimes you want a sharp edge!)
500
What is the difference of the 2 layer locks? (#32 A and B)
Solid- layer lock
Checkered- transparency lock

#32B: Layer lock: Prevents you from editing ANYTHING (drawing, erasing) in that layer.
#32A: Transparency lock: prevents you from editing transparent areas (where nothing was drawn)
500
Demonstrate how to copy & paste layers to create a pattern.
1. Draw something.
2. Click the layer and click "COPY"
3. Click the layer you want to paste it to, select it and click "PASTE"
4. Transform the copy if needed (enlarge, shrink,rotate)
5. Click done