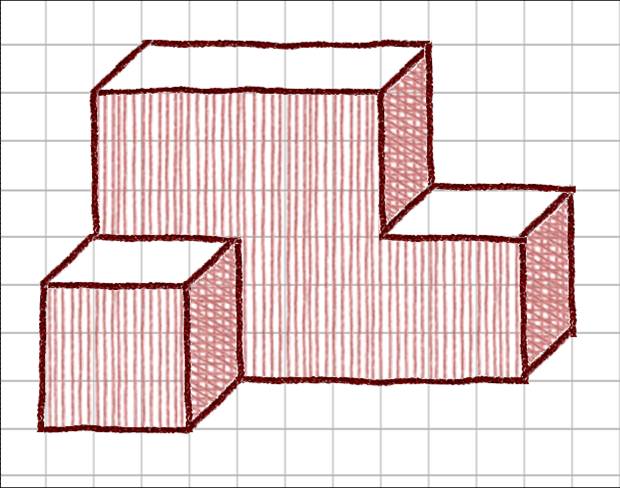
In this step wild ideas are encouraged.
Preliminary Ideas (Step 2)
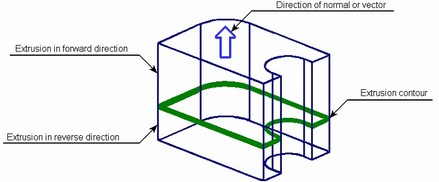
The direction of the extrusion is typically ___________ to the 2-D cross sectional sketch
Normal/Perpendicular
The purpose of Multiview Sketching
To Represent a 3-D object with a series of 2-D views

This Oblique sketch has it's depth is drawn full size. Object looks distorted (depth is exaggerated).
Cavalier Oblique


A rough freehand drawing used to document, communicate, and refine ideas developed in the ideation phase of the design process
Sketch
These lines are represented with dashed lines
Hidden Lines
The most important step in the Engineering Design Process
Problem Identification (Step 1)
Which solid model operator creates a single solid from two solids that intersect? You are combining both solids into one.
Union

Which face should you select as the Front View?
The most descriptive one

This Oblique Sketch has it's depth drawn to 1/2 of full size. Depth appears more accurate.
Cabinet Oblique
A method of projection in which an object is depicted or a surface mapped using parallel lines to project its shape onto a plane. Another name for Multiview sketching.
Orthographic Projection

Mention 3 tools useful for sketching
Pencil, Paper, Eraser. (Ruler and other geometric tools may count but are not necessary after practice).

In this step you have everything documented; you work with the marketing, and summarize your test results.
Implementation (Step 6)
In this solid modeling method, the axis of rotation must be defined and the angle of revolution must be specified.
Revolved
Which types of objects can be expressed by only one view?
Stamped, thin or extruded parts
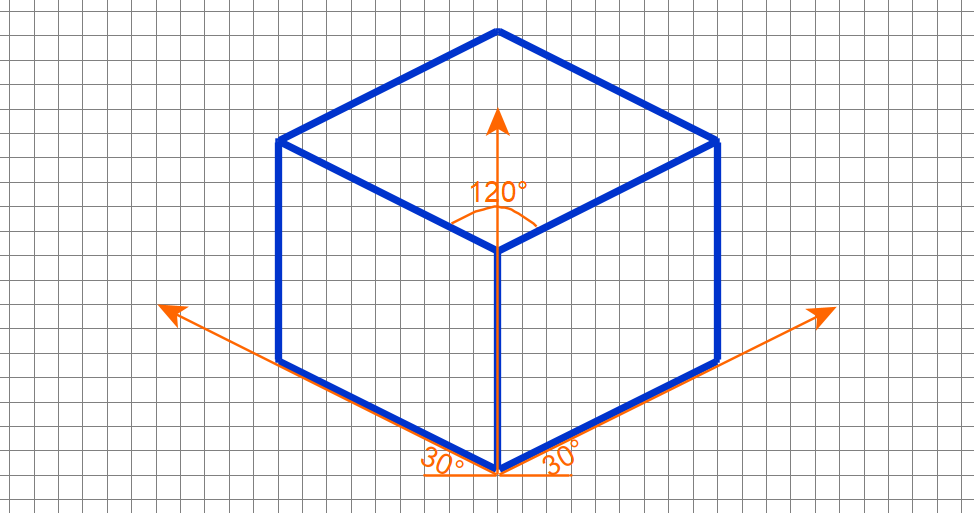
This Axonometric Pictorial has Three equal angles (120 deg). Height drawn along vertical axis. Width and depth drawn at 30 deg to horizontal axis.
Isometric View
A 3-D model of an object that contains volumetric information
Solid Model
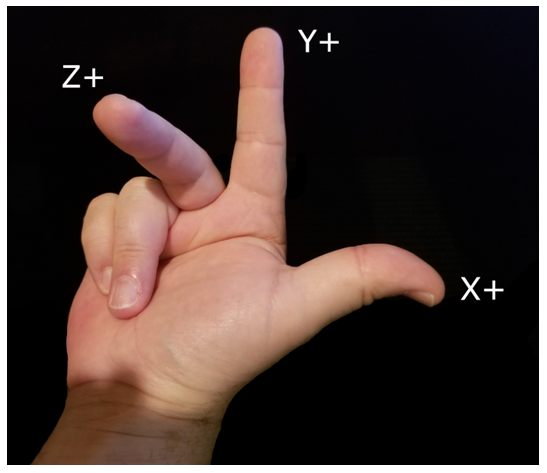
In the right hand rule, which finger corresponds to which axis?
Thumb to X-axis, Index to y-axis, Middle to z-axis.
In this step you apply the engineering and scientific principles to evaluate the design
Analysis (Step 5)
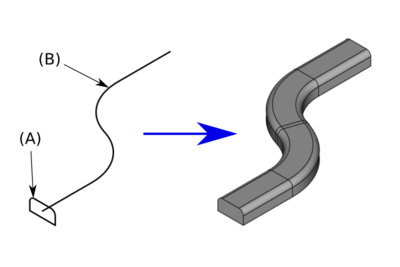
In this modeling method the path of the extrusion must be defined (trajectory), the extruded cross section must be defined, the cross section stays normal to the path
Sweep
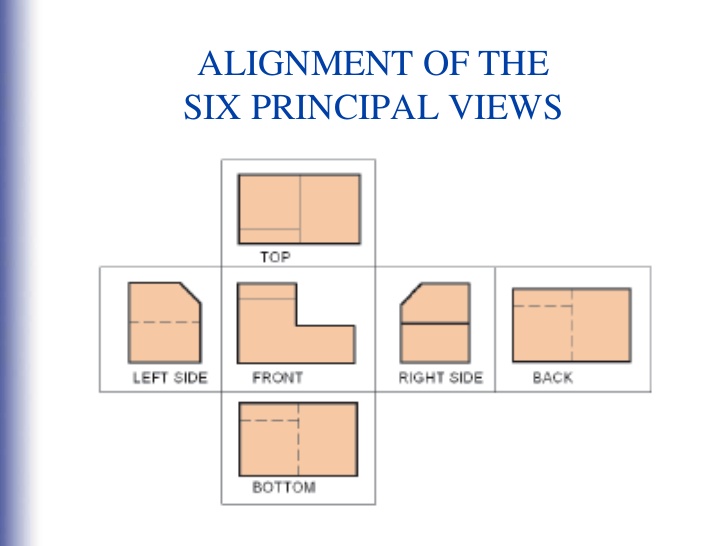
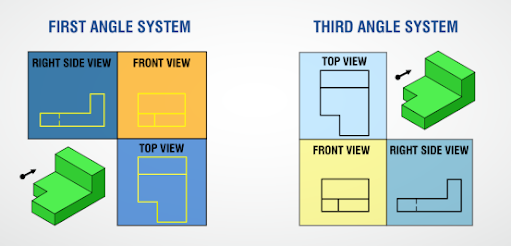
Which view is this?

First Angle Projection

For this projection lines are always drawn parallel. It's easy to draw. Often appears distorted. Its two common types are Oblique and Isometric Pictorials.
Parallel Pictorials

A sketch developed for ease of visualization that shows an objects height, width, and depth in a single view
Pictorial Sketch

Name two examples of Solid Primitives
Box (Parallelepiped), Cylinder, Cone, Sphere, Wedge

In this step you are looking at the most promising ideas from the previous steps. Working out the details of each design, making more sophisticated computer modeling (design visualization), and you are establishing how your systems will interact.
Refinement (Step 4)
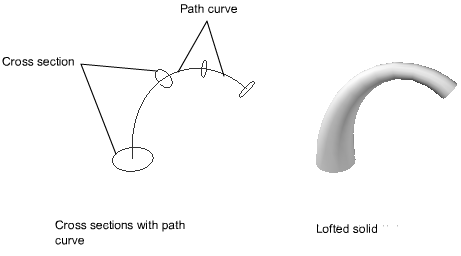
This method of creating solids uses a smooth transition can be made between two closed shapes with similar geometry (i.e. equal number of vertices). The distance between sections must be defined. Can be used to form a solid by connecting two separate planes.
Blend/Loft
Difference between First Angle and Third Angle projection
First Angle has top/bottom and left/right views on the opposite side, while Third Angle has them on their corresponding place.
This type of Projection Pictorial is the most difficult to draw, is the most visually accurate, has the use of vanishing points.
Perspective Projections 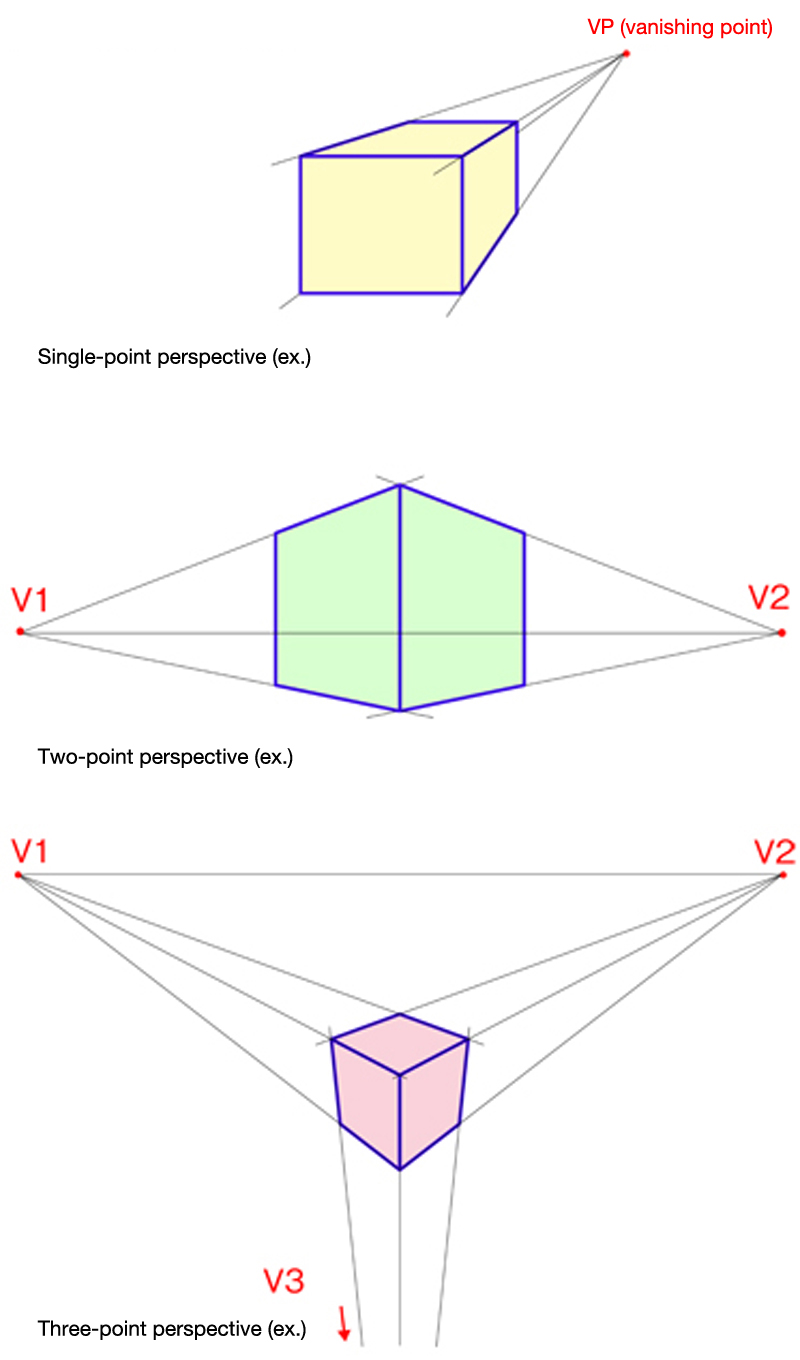
The use of drawings in the engineering design process based on a system of well-established rules and conventions that clearly conveys information about an object
Engineering Graphics

Name the 6 principal views
top, bottom, front, rear, left, and right side
